
Hello Chicken Raising Chicks!
Today's post is the second part of our five part Beginning with Chicks Series. If you missed the first post you can find it on our series announcement post, which contains all the available links for the series.
We'll be discussing setting up your chicks in their temporary home.
We'll be discussing setting up your chicks in their temporary home.
When you first bring your chicks home, or when they come in the mail, they will most likely need food and water as soon as possible, so its good to have this prepared in advance.
During the time your chickens are kept inside (6 weeks) they will need to be kept in a contained space. Some people use a brooder, but you don't have to go to all that trouble. We keep ours in a large plastic container (granted we have never ordered more then 10 chicks at a time). Some people even use a cardboard box, though I personally wouldn't recommend that because they have to be changed out a lot due to the smell.
Whatever you choose, just make sure they have plenty of room. The usual space needed per chick is 1 square foot for the first couple of weeks and by four weeks they'll need 2 square feet. And you'll need room for the water and food.
You'll also want to keep in mind that some chicks are escape artists and will try to jump out of the cage as they get older. Not all chicks do this. We haven't had any problem with our Silkie Bantams doing this, but every Ameraucana we've owned has tried this at least once.
After you've chosen your cage, container, box, or brooder, you'll need to add some bedding to the bottom of it. You cane easily use hay or grass but we have always preferred America's Choice Bedding Mini Flakes.

It's very easy to use, absorbent, and if your chicks consume these, it won't hurt them in any way.
Why do you need bedding? Well, you don't have to have it, but I definitely recommend it. It will help with the smell and make cleaning out the container/brooder ten times easier.
Now for the feed and water. You'll need to purchase at least one feeder and waterer.
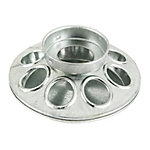
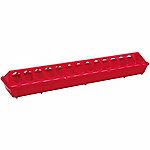
There are many different types of feeders available. The two above are often popular choices for those who have a smaller number of chicks.
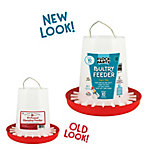
If you have a larger number of chicks, or would like to fill the feeder less, then perhaps this would be a good option.
As for waterers.
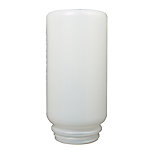
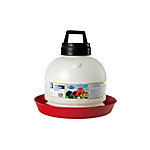
These are some good options.
All of these feeders and waterers can be found on TractorSupply.com for reasonable prices. Most of them can also be purchased at a feed store, or another online source. Shop around until you decide what is best for you.
Chick Starter is our feed of choice.
Medicated feed is what we usually use, though I would recommend organic feed for anyone who wants to sell their eggs. If you use the medicated feed (which contains Amprolium, a vaccine to prevent Coccidiosis, an parasite in the digestive tract of chickens.) you can not label your eggs as "organic".
You might want to do some research on feed options before you make your final decision.
The last thing you'll need is pretty dependent on location and weather.
A heat lamp. Not all chicken owners need these.
We are currently raising chicks and as you can imagine in August in Texas we aren't using the lamp. We used it the first two weeks just as a precautionary, but we haven't needed it since.
If you do need a heat lamp, you don't need to buy anything expensive.
You don't have to buy a lamp that says "Heat Lamp" on the package. Many people recommend a 250 watt bulb, and remember, you can move the lamp further away if you need to. Your chicks will let you know what to do because if they are too hot they will all be around the edge of the brooder/container is they are too cold they will all be really close together.
Just remember that chicks need it to be 95 degrees for their first week, and you can subtract by five for each week until they are ready for the great outdoors.
The lamp you'll be using will probably look like this:
If you have any questions or comments about something I didn't cover please leave a comment below or email me at chickenraisingchicks.cassandra@gmail.com
Thank you for stopping by to read our new series Beginning With Chicks and I hope you'll come back next week for our new post Beginning With Chicks: Bringing Your Chicks Home.

After you've chosen your cage, container, box, or brooder, you'll need to add some bedding to the bottom of it. You cane easily use hay or grass but we have always preferred America's Choice Bedding Mini Flakes.
It's very easy to use, absorbent, and if your chicks consume these, it won't hurt them in any way.
Why do you need bedding? Well, you don't have to have it, but I definitely recommend it. It will help with the smell and make cleaning out the container/brooder ten times easier.
Now for the feed and water. You'll need to purchase at least one feeder and waterer.
There are many different types of feeders available. The two above are often popular choices for those who have a smaller number of chicks.
If you have a larger number of chicks, or would like to fill the feeder less, then perhaps this would be a good option.
As for waterers.
These are some good options.
All of these feeders and waterers can be found on TractorSupply.com for reasonable prices. Most of them can also be purchased at a feed store, or another online source. Shop around until you decide what is best for you.
Chick Starter is our feed of choice.
Medicated feed is what we usually use, though I would recommend organic feed for anyone who wants to sell their eggs. If you use the medicated feed (which contains Amprolium, a vaccine to prevent Coccidiosis, an parasite in the digestive tract of chickens.) you can not label your eggs as "organic".
You might want to do some research on feed options before you make your final decision.
The last thing you'll need is pretty dependent on location and weather.
A heat lamp. Not all chicken owners need these.
We are currently raising chicks and as you can imagine in August in Texas we aren't using the lamp. We used it the first two weeks just as a precautionary, but we haven't needed it since.
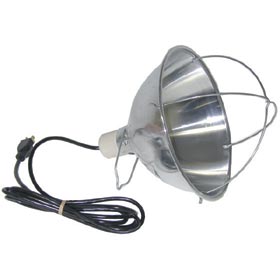
If you do need a heat lamp, you don't need to buy anything expensive.
You don't have to buy a lamp that says "Heat Lamp" on the package. Many people recommend a 250 watt bulb, and remember, you can move the lamp further away if you need to. Your chicks will let you know what to do because if they are too hot they will all be around the edge of the brooder/container is they are too cold they will all be really close together.
Just remember that chicks need it to be 95 degrees for their first week, and you can subtract by five for each week until they are ready for the great outdoors.
The lamp you'll be using will probably look like this:
If you have any questions or comments about something I didn't cover please leave a comment below or email me at chickenraisingchicks.cassandra@gmail.com
Thank you for stopping by to read our new series Beginning With Chicks and I hope you'll come back next week for our new post Beginning With Chicks: Bringing Your Chicks Home.
No comments:
Post a Comment